Search the Community
Showing results for tags 'building'.
-
 ☻ Welcome to Focus Point High ☻ Focus Point High School is hiring for several positions including teaching, coaching, administrative and more! We are looking for dedicated and friendly individuals who love immersive RP and would like to new ideas and skills to Focus Point High and it's students. Applicants are encouraged to choose (or create) any subject, sport or club that interests them. You may choose any from the following list or make up your own. * Be sure that you check with our faculty what classes are available, currently offered classes will not be hired for . * Business/Marketing Graphic Design Blogging Music Production Glee Club Literature Poetry Health Physical Education Culinary Arts Babysitter's Club Interior Design Gardening Home Economics Wood or Metal Shop Foreign Language Music Theory Anime Club World Music Gaming Club Astronomy Biology Cooking Club Oceanography General Science DJ Club Criminal Justice Anthropology Modern World Studies Psychology Sociology Scripting Photography Art History Auto Mechanics Cosmetology Drivers Education American Football Soccer Tennis Volleyball Boxing MMA Equestrian Club Building ► If interested please message : Ṃŕṩ Çђaяìşмa βΔΜβΔŦĦΔ (hotskorpion.charisma) OR ღ Pʋddιɲ ℒ. Çђaяìşмa βΔΜβΔŦĦΔ ღ (puddinpoppin) In-world Campus : Focus Point High School Campus Our website : www.focuspointhigh.com We look forward to hearing from you and don't forget to tell your friends!


-
I scanned the forum and didn't find exactly what I am looking for. So please forgive if this is a repeat of an existing discussion. I am look for a basic (doesn't need to be simple) primer on adding prims/objects to an existing full perm object. As in, adding small pieces of my own design/build to a full perm belt for example. Is there such a primer or basic template of the process somewhere? Thanks! Bran
-
 I have been trying for days to do physics for this one house and I am at my wits end. I have the model. I've built it and deleted it about 60 times now 😅and I really don't know where to go from here. If someone could help me understand and help me do the physics so I can see where I've been an absolute *****, it would be beyond appreciated.
 -
Although the topic says much of it what we're looking for, but I am going to explain in a more detailed way as well. Hello, my name is Raye; I'm the Web Manager of Racers Island. Racers Island is the oldest and largest racing sim in the grid and we're looking forward to re-construct it by giving it a hot and upgraded new look. What are we seeking? We're seeking for a mesh builder who is either experienced or familiar with the builds in Second Life. Even though it'd take a lot of time and amount, being this a really huge project; we also seek if you are willing to negotiate with the estimation. Portfolio is not necessary but would be nice if you have had built anything before. If you're a mesh builder and would be able to help us out to re-construct our racing sim; please contact directly in-world to: > Owner of Racers Island: Achillez Sauber [achillez Resident] > Web Mgr: Raye Queen Mendez [karenx0 Resident] *NOTE*: If we both are offline in-world drop us a notecard stating where you found out, or if you have SL Facebook ; contact us on SL Facebook ❤️ SL Facebook Links: [Click the name or click manually if that doesn't work] > Achillez Sauber [ https://www.facebook.com/achillez.sauber ] > Raye Q. Mendez [ https://www.facebook.com/Rayex4Travis/ ] Thank you ❤️
-
im trying to upload a mesh project to SL and although the scale appears fine in blender, when uploading it the scale is way off from what it was, can anyone tell me what im doing wrong? i have used a female mesh model to size it and that looks fine as its only a test subject at the moment but the only issue seems to be scaling and texture applying but why? any help would be great and thanks please see images below.


-
Hi everyone. I was happy to land in one of the new stilt homes. I chose the Havana home, which has an open back deck - no railing. I opened the Content Pack and found four sections of railing that could be used around the deck, but no newel post (that tall post that's used on corners and between railing sections). The stilt homes notecard says the content pack includes "a section of railings that you can use to build a safety barrier around your deck or porch to keep people from falling off." But without newel posts, any railing sections I rezz look incomplete. I can't copy-paste the newels from the home's existing railings, so not sure how to obtain newels that match. Does anyone know if the moles have made the newels available somewhere else separately?
-
Hey, my friend owns a racing sim named RACERS ISLAND. We are in dire need of a track builder. The Owner is willing to PAY for it. If anyone knows on how to build a track, please IM me inworld at Karenx0 Resident. I will set up a meeting between you two. Thank you.
-
I have been looking for a glass house for some time now and still cant quite find what I am looking for. I have gone to all of these places (onsu, roost, diamandis, redgrave, Maya's, Taikou, Youneed, Anxiety, Cozy Homes, Galland, La Galleria, Vicious Decay, La Galleria, Trompe Loeil, and C& D Designs) but havent yet found anything that will work with my land. I am in the middle of the water (kinda) so I want a house that is mostly all windows, 2-3 levels, 3-4 bedrooms on the larger side, with no driveway and preferably no outside pool since its more of an island situation, I have a decent piece of land and can fit about 40*50 for this house. There are a lot of beach/lake type houses with the wooden board outside structure but I am looking for something a little newer more of a sleek and modern aesthetic than that. I have found potentials at maven and trompe but hoping there are some other options out there on the grid just not sure how to find them. I have done a marketplace search and the options there seem lower quality than I tend to go for. Anything anyone can offer would be greatly appreciated. Thank you so much in Advance GiGi Monet
-
Prerequisites Cost to upload GETTING STARTED: Uploading your first model Step 1: Choose a model to upload Step 2: Define visual levels of detail Uploading your own LOD files Step 3: Define the model's physics shape Step 4: Upload Options Step 5: Calculate weights & fee Step 6: Upload Bonus section: Rigging options Wearing a model with rigging In other languages: Deutsch Español Français Português Italiano 日本語 Note: This is a basic walkthrough of how to upload a model. For full details on the parameters available for uploading a model, see Model Upload UI reference. Update: Viewer version 3.8.1.303230 modified the mesh importer to (optionally) improve debug output, perform name-based LOD association, and handle models with many materials. For additional information on this update, see the official Second Life Viewer release notes. Prerequisites Before you can upload mesh objects, you must: Have payment information on file. You can add payment information by visiting the Billing Information section of your Second Life account page. Have accepted the IP terms on your account page. If you are planning to use the beta grid (Aditi), you must also accept the IP terms there, but do not need payment information on file. Have at least one compatible COLLADA (.dae) file on your computer. You can create your own by using most popular 3D software packages, or, if you have the appropriate rights, you can download models created by other 3D artists from online repositories. Try our sample content page for a free model if you're just getting started. You may check your mesh upload status at any time by visiting your account page on the Second Life website. Cost to upload There is a Linden dollar fee to upload a model; the fee depends on the model's complexity. GETTING STARTED: Uploading your first model If you're new to uploading mesh models to Second Life, here's a quick and easy set of instructions to get you started. Don't worry about the myriad of controls in the upload window for now; they're for Residents who want fine control over their model's appearance and physics. For a more detailed breakdown of the upload procedure, keep reading below. To upload a mesh model: Choose a .dae file stored on your computer by choosing Build > Upload > Model. If you don't have any models on your computer, you may download some from the sample content page. Preview your model's automatically generated levels of detail on the Level of Detail tab by clicking High, Medium, Low, and Lowest. Notice how the object's complexity is reduced at each level. Click the Physics tab and choose Lowest from the dropdown menu in Step 1: Level of Detail. Step 2 and Step 3 are not required. Click the Upload options tab and check the boxes for any additional features on your model, such as textures. Click Calculate weights & fee, then review the resource weights, land impact, and Linden dollar upload cost of your model. Click Upload to upload your model to Second Life. Tip: To avoid spending Linden dollars while experimenting with uploading models, you may wish to use the Second Life Beta Grid (Aditi). The Beta Grid allows you to test new features and experiment with potentially costly designs in a safe environment, using a copy of your Second Life account. Actions taken on the preview grid cannot affect your inventory or L$ balance on Second Life's main grid. Step 1: Choose a model to upload Second Life accepts COLLADA (.dae) models, which can be edited and created in many popular 3D modeling packages. If you do not currently have any COLLADA models on your computer, you may download some from the sample content page. To begin uploading a model: Choose Build > Upload > Model... Select the .dae file on your computer and click Open. In the Upload Model window, enter a suitable name for your model in the Model name field. If your model includes textures, check the Textures box underneath the Preview pane to make sure the textures are displayed properly. Step 2: Define visual levels of detail Levels of detail determine what your model looks like from various distances. As you get farther away from a model, it renders in less detail to boost visual performance. Second Life generates these lower detail models by default, but you may use this step to tweak each level or even upload your own lower detail models. You can preview your model at any level of detail by clicking High, Medium, Low, or Lowest. While previewing your model at each level of detail, you may change the parameters used for simplifying it from your original model if you chose Generate from one of the Source dropdown menus. For full details on Triangle Limit and Error Threshold, see Upload Model UI reference. Uploading your own LOD files You may upload your own simplified models by choosing Load from file from the Source dropdown menus. You may wish to create your own lower-detail models in order to preserve critical details that may be lost during the automatic simplification process. The mesh uploader uses very strict naming rules for these custom LOD files: File names ending with "_LOD2" must be used for Medium level of detail File names ending with "_LOD1" must be used for Low level of detail File names ending with "_LOD0" must be used for Lowest level of detail File names ending with "_PHYS" must be used for the model's physics shape Additionally, material names must match exactly between each level of detail. Some 3D modeling programs such as Blender automatically change material names to prevent duplication when multiple versions of a model are loaded into the same scene. Material names are sorted alphabetically upon importing a model from the 3D modeling program of your choice, and may not retain the order they had in the original model. If material order is important to your model, you must name them accordingly. For more detailed information on uploading mesh models with multiple materials, see Uploading a multi-face mesh on the Second Life Wiki. Note: If you need to upload an old model that does not conform to these LOD naming rules, you may enable the debug setting called ImporterLegacyMatching in the Second Life Viewer. Access the Debug Settings window by choosing Advanced > Debug Settings from the top menu bar. Step 3: Define the model's physics shape A model's physical shape, as interpreted by Second Life's physics engine for calculating collisions, can be different from its visual shape. For example, you may wish to simplify a very complex vehicle into a square physical box shape, which allows you to have a visually complex vehicle that requires comparatively little physics computation and does not overtax the region's ability to process moving physical objects. You may upload your own physics representation as a .dae file or you may use Second Life's analysis and simplification tools to generate a physics shape automatically. The quickest way to generate a physics model for your object is to choose Use Level of Detail and select a level of detail from the dropdown menu. This creates a physics model based on one of your model's visual levels of detail. Remember that lower physics costs are desirable, so choose the lowest level of detail that reasonably represents the shape of your model. You do not need to complete Step 2: Analyze or Step 3: Simplifiy unless your physics model is extremely complex or shows red lines in the preview window. For advanced information on usage of the physics analysis and simplification tools, see Upload Model UI reference. Step 4: Upload options Before you upload, make sure to include any necessary optional parameters on the Modifiers tab: Scale: Changes the base size of your model. Increasing the scale increases the resource cost. Include Textures: Includes any textures applied to the COLLADA model. The textures are automatically applied to the Second Life version of the model when it is uploaded. Include Skin weight: Includes any skin weight information in the COLLADA model. This option only applies to models that are meant to move and flex with your avatar when worn as avatar attachments. Include Joint positions: Includes joint position information from the COLLADA file. This option only applies to models that are meant to alter an avatar's joint positions when worn as an attachment. Pelvis Z Offset: Changes the vertical positioning of a rigged model. Step 5: Calculate weights & fee When you click Calculate weights & fee, Second Life calculates the download, physics and server weights of your model in order to determine its land impact and Linden dollar upload cost. The base Linden dollar cost to upload is L$10 plus L$10 for each texture applied to the model, and an additional cost based on the complexity of the model. For more information about weights and land impact, see Calculcating land impact. Step 6: Upload When you upload a model, it appears in the Objects folder in your inventory. As with all objects in Second Life, you can then drag it from your inventory to the ground, or you can wear it as an attachment. Bonus section: Rigging options Rigged models allow you to represent your avatar skeleton as a mesh that conforms to your joints and motions. This means that you can wear a rigged model that changes the length and orientation of your avatar's limbs and animates accordingly. If your COLLADA model contains joint position and skin weight information, you can preview how it will look with an avatar's default idle animation by checking the Skin weights box underneath the Preview pane. Wearing a model with rigging You may wear a rigged model by right-clicking it in your inventory and selecting Wear. You may often wish to pair a rigged model with an alpha mask to hide your avatar's normal shape.
-
I made the following 3 stores. For each of these stores, I got a separate roof, floors and walls on each side. I first made the centre store, then made the right side and mirrored it to left. Applied the transformations, baked all textures & made all LODs. Those 2 sides have same number of materials, same number of vertices & tries (as per Blender). But somehow, I get two different Land Impacts on left & right roofs & 1st floors. Everything else matches. Below are the LI when those are set to Prim (Physics Shape Type). Both have hole for stairway. Dimensions are same (both physics & mesh) Left (LI) Right (LI) Remark Roof 3 4 Convex Hull LI (left - right): 3 - 4 Both have same physics, download & server weight. But more display weight is different (L)1826 - (R)1831 - Both side carries 3 textures. Only difference i found was 4 extra vertices on left (this side happens to give low LI than the other) All LODs have same vertices & tries (as on upload window) Both roofs have physics of 2 tries 1st Floor 3 2 Convex Hull LI (left - right): 2 - 2 Both have same download, server & display weight Somehow Mesh is high on left. Thus high physics - Both dimensions are same & I have double checked if it goes beyond boundary. all good. Only difference I found here was 1 extra vertices on right (this side happens to give low LI than the other) All LODs have same vertices & tries (as on upload window) This is after I managed to remove 2 physics tries from each. Before it gave 6 - 3 (left - right) LI (in Prim mode) Both floors have physics of 8 tries Floor Upload Window So I'm quite puzzled about this & curious to know whats the cause and how could it be fixed or at least a way to lower the LI.


-
Hi, I have a small building project I’ve been tasked with but unable to do myself or without assistance of some sort and was wondering if there were affordable builders for hire or if anyone here might be interested? For more details on the project I can be reached InWorld (Ksenia Jovinavic) or via my email kseniajovinavic@yahoo.co.uk
-
I have a need for a full sim builder to build sims, or update existing ones. I'm easy to work with and will pay well, but I am very exacting in what I want. Job Requirements English Speaking. Ability to organize things and have good skills when laying out lots of objects. Sketch out an idea of how the build will be before hand. You must be able to build to a general theme (eg: Fantasy, or Retrowave). You must be able to enter skill gaming regions. No exceptions. (If you cannot, please read here for information: http://wiki.secondlife.com/wiki/Linden_Lab_Official:Second_Life_Skill_Gaming_FAQ#Why_can.E2.80.99t_I_access_a_Skill_Gaming_Region.3F ) You must build all components used in the build, or otherwise have full permissions of any objects used, with rights to transfer them to me in a build. You must be willing to build this exclusively for me, and give me the rights for me to use the build anywhere in SL as I like. You will be properly credited for the build, of course. You must be able to build across several connected regions, accounting for SL bugs, such as falling through geometry when walking across a sim crossing, etc. Please contact me in world (vexacion resident) for additional details or to ask me any questions. I will not be keeping up with the forum as well as I would in world.
-
 Hi Lindens and Moles: Could you please define this so everyone knows the correct information: What is the actual conversion rate of a SL meter to RL feet/inches and vice versa? I have looked for this info but have never found the specific and accurate definitive answer - just guesstimates. Having these conversion rates officially defined by LL will be helpful in scaling buildings, avatars, etc. Maybe you could create an official LL/SL scaling grid texture to put on various meter sizes of prims (1, 3, 5, 10, 20, 30, 40, 50, 64) which would be tres cool tool and immensely helpful particularly for peeps who choose to build or size their avatars to to RL scale. Make it available inworld and on MP and perhaps place them in the inventory LIBRARY in a viewer update. Thank you! xo
 -
Looking for a builder who can do a custom home. Please contact me inworld at Finn McCulloch (finnmcculloch)
-
Hi again Second life Fourms. It's a long while since i was on the game and i have been working on alot of scripts. Recently i re-watched the HBO chernobyl serie and got inspired to try and build a Powerplant in second life with a few friends. Tho i strongly recall that we all had 1 issue with the game. The prim count- Our main problem with Second life is that we would like a big building with alot of small rooms but it would take up 200+ prims. Dose anyone know of a program, designer and/or place you can make/buy/get buildings with a low-prim count? Thanks to everyone in advance and hope you have a wonderfull day! :3 (also sorry for bad grammar-)
-
I am very new to building, I wanna build stuff to put in the marketplace, I don't where to begin. I'm afraid if I do it in world, it won't be good enough. I have so many Ideas! Any advice would be awesome!!
-

texture any PROBLEM with TEXTURES nowadays?
millenakera posted a topic in Building and Texturing Forum
does anyone knows what happened with textures nowadays? all my textures cant seem to be stretched and stay in their original sizes, that they created unpleasant texture boxes (in original sizes) on the whole platform, and not one big stretched texture. i tried to rez in various places and all came out the same. must be something in my own (avatar) setting? i even tried to resize my existing carpets, and they created boxes out of the current size too if i resize them bigger. what is wrong? anyone knows how to solve this? please help. how to solve this? really appreciate any helpful answer in advance millenakera -
Hello, i've encountered an issue which I can't seem to get my head around. When importing objects into SL, I've been importing mesh with a physics shape too, which is analysed and imported. When the mesh is set to 'prim' the physics works perfectly. However when objects are linked together and set to prim, sometimes it doesn't work. Which is fine, so I then go and unlink the objects to their individual parts, set them each back to prim to apply the physics shape only to find that they now will not apply the map at all. Leaving objects being completely phantom. I cannot get my head around how to get the physics shape to apply again. Incidentally, I'm also having an issue where if I duplicate a mesh object, for example something i'm using as a floor. The duplicated object doesn't have any physics applied to it either, despite whether it's in PRIM or Convex hull. Is there anything I can do?
-
Am I correct in thinking that if I wish to put a swimming pool on my land with its own water, it needs to go on a raised deck to avoid the sim water? The store Im considering buying from is in the sky so their sample pools are flush with the ground with no sim water to worry about. Any advice gratefully received. I am not what you'd call an experienced builder lol.
-
The coalesce feature Coalesced object relationships Caveats about coalesced objects Troubleshooting selecting objects Sandboxes Public Linden sandboxes Building with other Residents The group method The friend method Tip: For an overview of the tools available for building objects in the Second Life world, see the Build Tools article. The coalesce feature A coalesced object is a combination of objects taken or returned into inventory together. If you select multiple objects and choose Take from the object menu, they'll be taken into your inventory as a coalesced object Try this experiment to locate your coalesced object in My Inventory: As this experiment shows, coalesced objects are found in My Inventory with the name of the last object selected. When the selected objects are taken into inventory, the coalesced object is located in the Objects folder. When they are returned, the coalesced object is located in the Lost And Found folder. Note: Single objects in inventory have an icon that looks like a cube (), while coalesced groups of objects have an icon that looks like a stack of cubes (). Coalesced object relationships When an object is placed inworld, it has coordinates that identify its location on the grid. These XYZ coordinates are relative to the region the object is placed in. When more than one object is taken or returned into a coalesced object and then rezzed at a new location, each object shows different XYZ values relative to the new location, however the objects maintain their spatial relationship to each other. For an introduction to coalesced object relationships, take a look at this quick tip video: Now that you see how objects maintain their relationships to each other, you can use this information when creating a coalesced object on a large parcel and rezzing that object on a smaller parcel. Since the objects maintain their relative positions, you will need enough square meters of land to rez the coalesced object again. Caveats about coalesced objects Rezzing a coalesced object near a parcel/region boundary may result in objects being returned to inventory. Coalesced objects have prim limits because the time required to rez them can exceed the capacities of Second Life's servers, causing problems when Residents attempt to take complex coalesced objects into inventory. To rez an object that exceeds the prim limit, create a support ticket requesting that the object be broken into a set of smaller objects. Parcel owners can rez Linden trees. When using the Click-Drag-Select method for your content, make sure the selection area does not contain Linden trees unless you are planning to rez the coalesced object on a parcel that you own. Take the same precautions when using Shift-Select. If you have a coalesced object with Linden trees or would like to learn more, watch this video tutorial: Selecting moving objects can cause those objects to go offworld when you rez the coalesced object. Either take those objects into inventory separately, or, if you want to turn off all scripts in all of the selected objects, go to Build > Scripts > Set Scripts to Not Running. Warning: If your coalesced object contains one or more no-copy objects and is rezzed across the boundary of a parcel where building isn't allowed, the content will not return to your inventory, resulting in content loss. Don't rez coalesced objects close to no-build parcels from Torley on Vimeo. Warning: A maximum of 1000 scripts can be rezzed at once! If you are creating a coalesced object with many scripts, try creating objects in sections that contain scripts so that you will be able to rez those objects again. If you have valuable content, take those items into inventory before taking or returning your other items. If you're having trouble rezzing a coalesced object, please contact Support for further assistance. Troubleshooting selecting objects Right-clicking an object and choosing Edit selects the object, opening a floating window with many editing options. Alternatively, in Edit mode, you can drag and draw a selection rectangle over multiple objects. If both of these fail to make object outlines appear (indicating they have been selected), then try the steps below. Go to Build > Options. Uncheck Select Only My Objects if you're trying to select objects owned by another Resident. This includes a friend who's given you permission to edit their objects. Uncheck Select Only Movable Objects if you're trying to select an object you can't move. This is generally determined by Allow anyone to move in the General tab of the build tools, but also applies to group-deeded objects and objects a friend has allowed you to edit. Uncheck Select By Surrounding if you have a hard time using the selection rectangle to select objects. Re-select the desired objects. Sandboxes A sandbox is a parcel of land which has been put aside for building practice. Much like real sandboxes and conceptual sandbox games, these are spaces of creativity and chaos. Several sandboxes exist for specific purposes — such as the Weapons Testing Sandbox — but the majority are simply for regular building. Signs within each sandbox area make it clear what kind of activities are allowed there. Sandboxes usually have auto return enabled to clean themselves several times a day; look for auto-clean info before building, so you aren't caught by surprise. Since sandboxes are experimental, they may also be unstable — be sure to regularly take inventory backups of anything that's important. What is a sandbox? from Torley on Vimeo. Public Linden sandboxes These full-region sandboxes are owned by Linden Lab: Sandbox Cordova - Push scripts off. Sandbox Goguen - Push scripts off. Sandbox Newcomb - All scripts off. Sandbox Wanderton - All scripts off. Sandbox Island - Push scripts off. Sandbox Island Extension - Push scripts off. Sandbox - Weapons testing (no damag - Push scripts on; damage off. Combat (sandbox) - Red Team's HQ - Damage-enabled; you can be killed here (and teleported home). Combat (sandbox) Rausch - Damage-enabled; you can be killed here (and teleported home). Combat (sandbox) - Blue Team's HQ - Damage-enabled; you can be killed here (and teleported home). Zindra Vortex - Located on the Adult continent Zindra. There are also these partial-region sandboxes, smaller than the above but still useful if you're nearby: Sandbox Morris - Near the famed Morris-Ahern Welcome Area. Sandbox Plum - Near Lime, which was at one time a Welcome Area and a copy of the even-older Morris design. Here "landbox" for terraforming - Feel free to reshape the terrain. Watch a video tutorial showing you how. Building with other Residents There are a few ways to allow friends to edit your objects in Second Life. This is often referred to as collaborative building or collaborative creation. It's a useful way to let groups of people work together on a building project. The group method Right-click the object and choose Edit to bring up the object editor. Click on the General tab in the editor. Click on the Edit Wrench to the right of Group and assign the object to the group you and your friend are in. Select the checkbox below. Note: If you want other group members to be able to take copies of your object, you should make sure to set the next owner permissions (Modify, Copy, Transfer) appropriately. Note: Any other group members will also be able to edit the object. Group members can only edit objects that are shared with the group, according to their Group Role permissions. Object-related group permissions (and friend permissions) are explained in this video tutorial: Let friends & groups edit your objects from Torley on Vimeo. The friend method Open your friends list by clicking Communicate > Friends. View your friend's profile by clicking the View profile icon on the far right by his or her name. Click the Gear button on the upper right of the profile window that appears and select Permissions from the dropdown. Select the Edit, delete or take my objects checkbox. Click Save. Important: This gives your friend the ability to edit all of your objects. Making sure you are shown as the creator of an object It sometimes happens that a skin or shape you've modified and prepared to sell still lists someone else as the creator. (To view the item's creator, right-click it in Inventory and select Object Profile.) This tends to happen if you use one of our system default avatar templates in your Inventory's Library > Clothing folder. If the item is fully permissive, then there are no functional restrictions: you can modify and sell it. For the sake of consistency, you may still prefer to have your name listed as its creator. To make sure your name is listed as the creator of an object: Click the Inventory icon on the toolbar. Click the + button at the bottom. You'll see you can make new item types like scripts, notecards, gestures, clothes, and body parts. All of these will list you as creator. Try it and see! While you cannot change the creator of an item, you can copy a modifiable item's settings to another item that lists you as creator. For example, a body shape consists of numerous slider settings, so you can reproduce the shape by using the same slider settings. Important: Respect intellectual property! Don't use the technique above to infringe on someone else's copyright. All objects you originally rez inworld are created in your name. If you link multiple objects together to form a linkset (Build > Link), the last selected prim will be the visible creator when an object's properties are shown, although that doesn't tell the full story. To show all prim creators in an object: Right-click the object. Click Object Profile. The INVENTORY window opens. Click the Details button at the bottom of the window. This opens a window that lists the individual prims and who originally created them.
-
To those who may take heed, Might I ask if it is possible to import/export files betwixt Microsoft 3D builder (generally for 3D printing) for Windows 10 and Blender 2.8; being able to edit and create, animate, and the like....and utilizing lithopane as well...? And then transporting that upon SL? I am, of course, new here....I do understand some things, but I'm confuzzled on a lot others 'bout SL..... however, I do love to create a plethora of things, scenes and buildings upon the 3D builder, but if I can correlate with various tools/mediums, it'd be a unique wonder! Any sort of aid or consideration is appreciative, and I am truly grateful for your attention.. -Ms.Serpyne
-
Hello! Does anyone know if you can display a texture, or even just view it, by using the asset UUID?
-
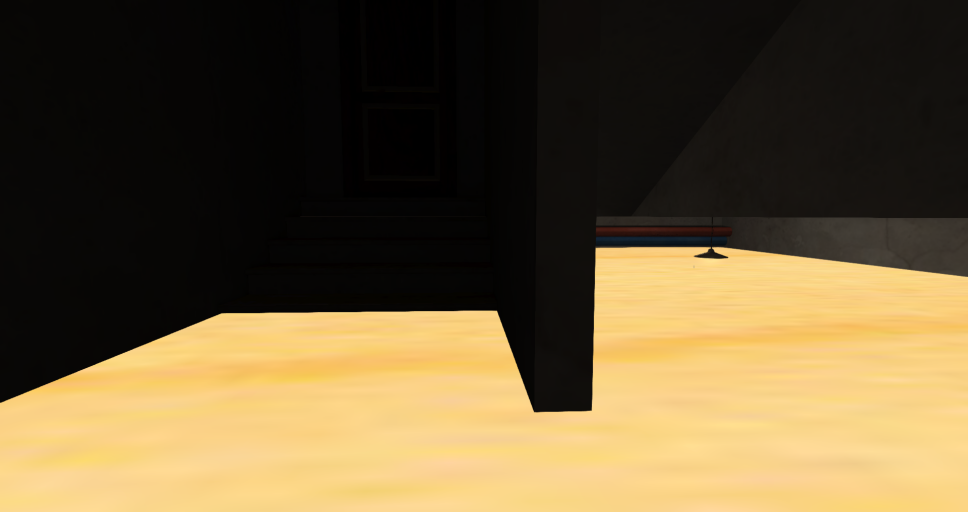
 A couple of disclaimers before I get into the issue: I'm a complete noob at building/terrforming and anything of that sort so forgive me if this is a stupid question. I also wasn't sure if this was the correct forum to post this in so please move this if needed. I live in a sim that doesn't allow terraforming but I've found a house that I'd really like to use that has a basement. The land itself is pretty uneven and on a slope so I'm not sure if I would even be able to make it work down there. I'm okay with using it on a sky platform but I'm not really sure how to make it work like that either with having the house sitting perfectly on the ground/platform but also not having the platform blocking the basement. I'm not sure if I'm explaining this in a way that makes sense so I'll attach some pictures that will hopefully help. I'm also willing to send anyone a TP to come look at it in world if that would help too.
_001.png.c98fd4b84361fd2499bbdd897bd0507a.png)
-
I was blacklistng some ojects in a sim but accidentally blacklisted one I did not mean too. How do I find a list of blacklisted objects so I can undo it? Right Click > More > More > Derender > Blacklist Please help!!! I lost my entire wall lol
-
 Eden Valley RP High School is hiring for a variety of positions including teaching, coaching, supervising clubs and more! We are looking for creative, dedicated and friendly individuals who not only have an interest in RP but wish to make a difference in our community by bringing new ideas and alternate perspectives. Applicants are encouraged to choose (or create) any subject, sport or club that interests them. Please keep in mind that you may choose any from the following list or make up your own. * Be sure that you check our schedule and faculty pages for currently offered classes as we will *not* hire for a class that is currently being taught. * - Business/Marketing - Graphic Design - Blogging - Music Production - Glee Club - Literature (World or US) - Poetry - Health - Physical Education - Culinary Arts - Babysitter's Club - Interior Design - Gardening - Home Economics - Wood or Metal Shop - Foreign Language - Music Appreciation or Music Theory - Anime Club - World Music - Gaming Club - Astronomy - Biology - Cooking Club - Oceanography - General Science - DJ Club - Criminal Justice - Anthropology - Modern World Studies - Psychology - Sociology - Scripting - Photography - Art History - Auto Mechanics - Cosmetology - Criminal Justice - Drivers Education - American Football - Soccer - Tennis - Volleyball - Boxing - MMA - Equestrian Club Please visit us on the web to apply: https://edenvalleyhighschool.com/apply Campus Information: https://edenvalleyhighschool.com/ Campus Location: Eden Valley High School Campus (Click Here) For more information or a campus tour please contact: Mr Jesse Magic (Iamsoo Magic)


.thumb.JPG.a9f4153d8b0a38429357bcb890c4836e.JPG)


_001.png.c98fd4b84361fd2499bbdd897bd0507a.png)


 Facebook
 Instagram
 Twitter
 YouTube
 Flickr